Saturday, January 30, 2016
How To Fix Error: Invalid command 'Header'
.
Error:
Invalid command 'Header', perhaps misspelled or defined by a module not included in the server configuration.
Solution:
Refer this tutorial, http://php-steps.blogspot.my/2016/01/how-to-define-http-header-specification.html
How To Enable Cross-Origin Resource Sharing
.
Cross-origin resource sharing (CORS) is a mechanism that allows restricted resources (e.g. fonts) on a web page to be requested from another domain outside the domain from which the resource originated. (wikipedia)
We can set a website to allow CORS by writing Header specification in .htaccess file (available on Apache server.
Refer this tutorial to set the Header Specification that enables CORS.
.
Besides that, we can also add the following codes into the PHP script that we are sending request to.
<?php
header("Access-Control-Allow-Origin: *");
...
What is HTTP Header?
.
HTTP header fields provide required information about the request or response, or about the object sent in the message body. There are four types of HTTP message headers:
- General-header: These header fields have general applicability for both request and response messages.
- Client Request-header: These header fields have applicability only for request messages.
- Server Response-header: These header fields have applicability only for response messages.
- Entity-header: These header fields define meta information about the entity-body or, if no body is present, about the resource identified by the request.
Source: http://www.tutorialspoint.com/http/http_header_fields.htm
.
Further Reading: http://code.tutsplus.com/tutorials/http-headers-for-dummies--net-8039
.
Related: How to define HTTP Header specification for a website on Apache Server?
How to define HTTP Header specification for a website on Apache Server?
.
How to define HTTP Header specification for a website on Apache Server?
This tutorial shows how to define the HTTP Header specification for a website on Apache Server.
We will be using a portable web server uwamp as it provides a visual interface to access the Apache Module Settings.
Then, we look for the Apache Config file containing the settings.
Finally we write and save the specification in .htaccess file for our chosen website path.
|
1) Download and Run UwAmp server.
UwAmp server is just to help us find the Apache Module Settings quickly. It is really useful for beginners who are struggling to understand so many aspects of a web server.
Download the application from http://www.uwamp.com/en/?page=download or from here.
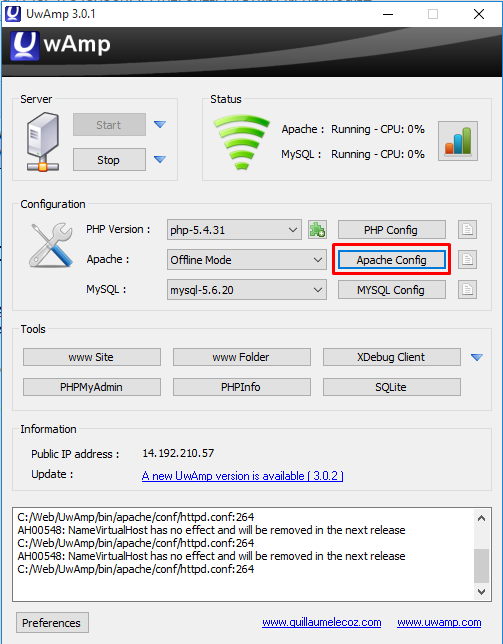
When you run, you should get a user interface as follows. You should notice the Apache Config button. Click on the button.
2) Apache Config Window
Apache Config window consists of two tabs; Virtual Server and Modules.
Select Modules tab.
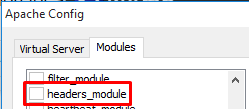
Scroll down until you see the item headers_module. Select the item.
Close the window.
where is it (module setting value) actually saved?
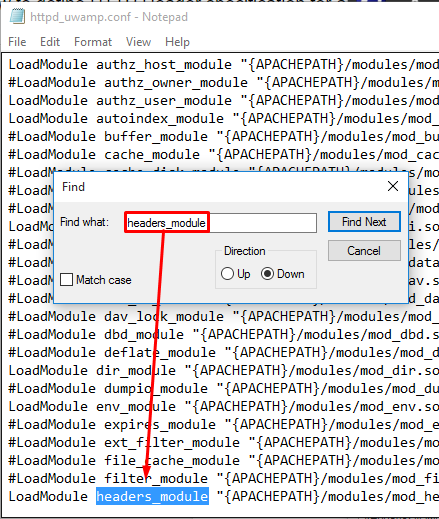
Click on the Code button besides the Apache Config button.
The setting value is actually stored in a file ‘httpd.conf’ (in UwAmp, it is stored as httpd_uwamp.conf’.
So, next time, if you want to enable headers_module, search for the file ‘httpd.conf’ and delete the symbol ‘#’ prefix.
3) Write Header Specification in .htaccess file
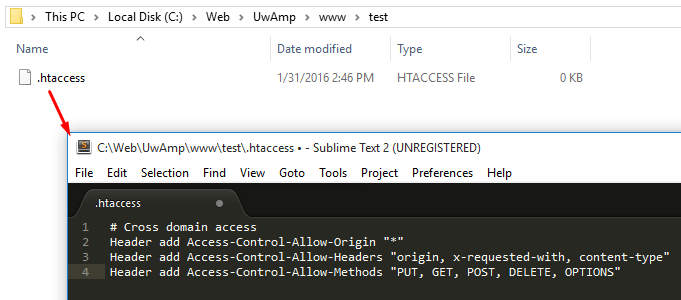
We put the .htaccess file into a folder that we would want to enforce our specification.
Assuming we have a folder ‘test’ under localhost which we want to enforce our specification, we would do as follows.
codes:
# Cross domain access
Header add Access-Control-Allow-Origin "*"
Header add Access-Control-Allow-Headers "origin, x-requested-with, content-type"
Header add Access-Control-Allow-Methods "PUT, GET, POST, DELETE, OPTIONS"
|
Run the server and browse the url http://localhost/test
4) Test
Let’s see what happen when we disable the module.
Go back to UwAmp window and disable the headers_module item.
|
The server should restart automatically.
Browse the url and see the outcome.
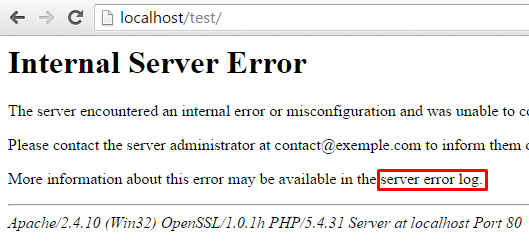
Here, we see that when the headers_module is disabled, the server will return the error message:
Internal Server Error
The server encountered an internal error or misconfiguration and was unable to complete your request.
Please contact the server administrator at contact@exemple.com to inform them of the time this error occurred, and the actions you performed just before this error.
More information about this error may be available in the server error log.
Apache/2.4.10 (Win32) OpenSSL/1.0.1h PHP/5.4.31 Server at localhost Port 80
|
The server also explains more in the server error log file.
Let’s look at the file.
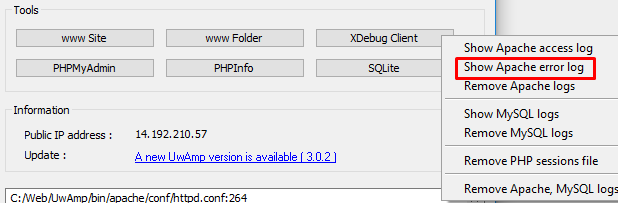
Go to UwAmp window and look at the Tools Section. There is a small drop-down button. Click it and select show Apache error logs.
The file will be automatically opened by the default text editor.
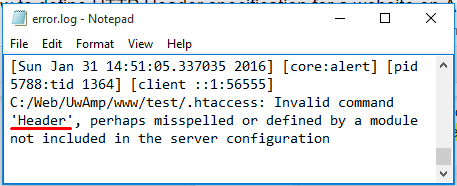
The log gives us sufficient evidence that the error comes from our .htaccess which contains an invalid command. In our case, the command is not recognized because the related module is not included in the server configuration.
C:/Web/UwAmp/www/test/.htaccess: Invalid command 'Header', perhaps misspelled or defined by a module not included in the server configuration
|
Select the headers_module again and you should get back the initial output.
Friday, January 29, 2016
How To Install OctoberCMS On Hostinger Site
.
How To Install OctoberCMS On Hostinger Site
1) Download OctoberCMS installer file.
2) Upload to Hostinger.
2.1) Upload
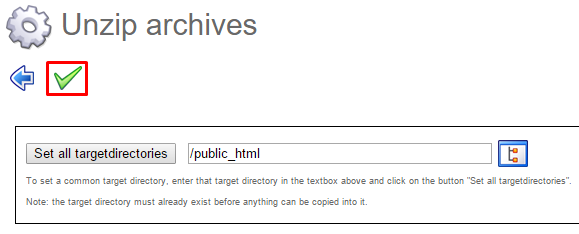
2.2) Unzip
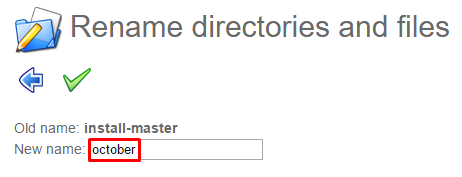
2.3) Rename the folder.
Rename the install-master folder into your preferred name, e.g october.
2.3) Apply chmod
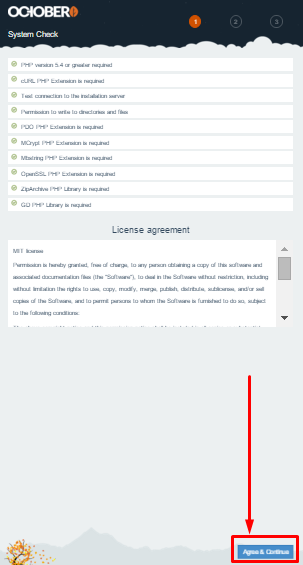
3) Browse installer page.
3.1) Browse the installer URL.
e.g. http://notarazi.esy.es/october/install.php
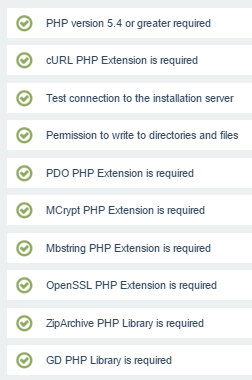
Make sure that your server fulfills the requirement.
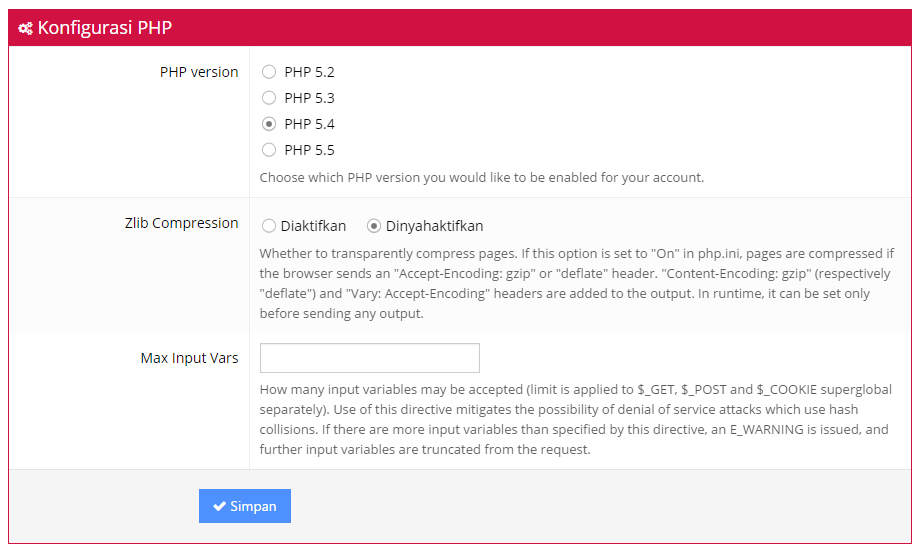
(If your hostinger site runs lower version of PHP, follow this tutorial to change the version).
Click Agree & Continue button.
4) Select Database Type
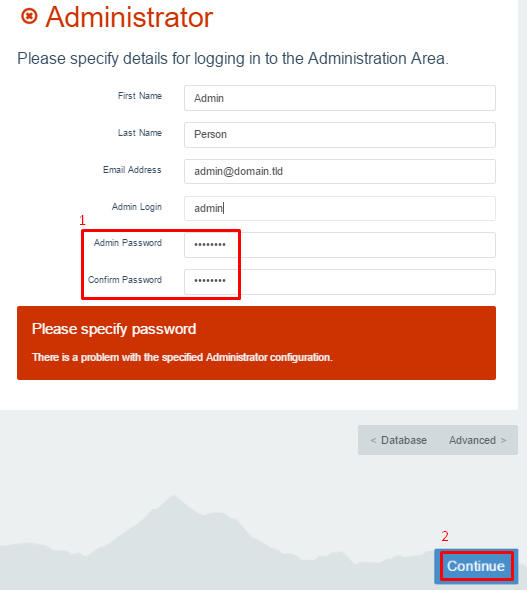
5) Specify Admin Password
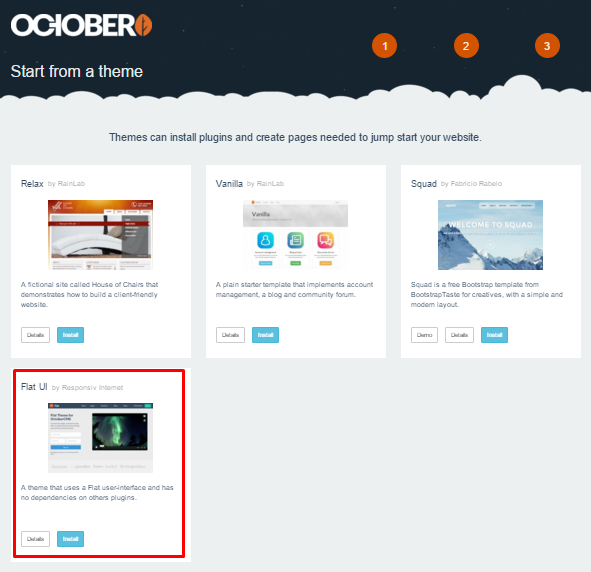
6) Select a Theme.
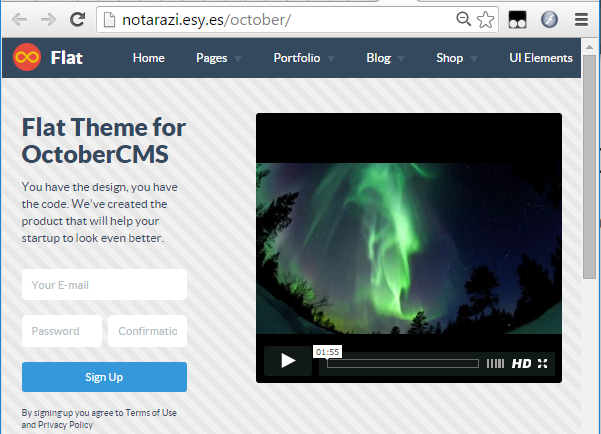
7) Test
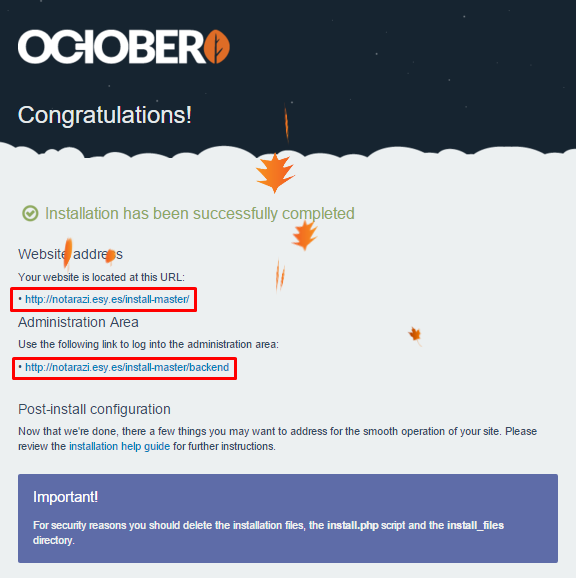
7.1) Front End
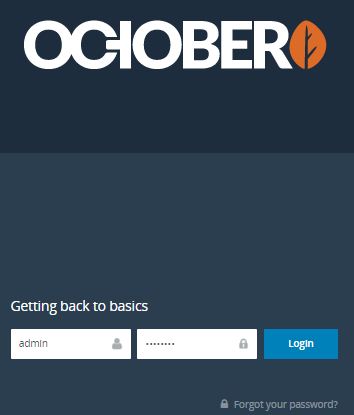
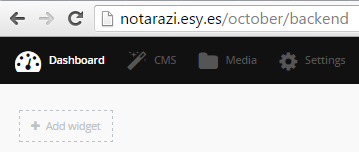
7.2) Back End
Reference:
How To Change PHP Version at Your Hostinger site
.
How To Change PHP Version at Your Hostinger site
1) Log into your hostinger site.
2) Select your hosting account.
3) Find the PHP Version info on the left panel
4) Click the version number to change the value.
Saturday, January 10, 2015
PHP AJAX JSON MYSQL - simple example
---
---
1) Create MySQL Database test and populate with sample data
1.1) log into PHPMyAdmin.
1.2) Create a new database, test.
1.3) Using SQL Editor, paste the following codes and run.
--
-- Table structure for table `people`
--
CREATE TABLE IF NOT EXISTS `people` (
`id` int(11) NOT NULL,
`firstname` varchar(55) COLLATE utf8_swedish_ci NOT NULL,
`surname` varchar(55) COLLATE utf8_swedish_ci NOT NULL,
`title` varchar(55) COLLATE utf8_swedish_ci NOT NULL
) ENGINE=InnoDB DEFAULT CHARSET=utf8 COLLATE=utf8_swedish_ci AUTO_INCREMENT=3 ;
--
-- Dumping data for table `people`
--
INSERT INTO `people` (`id`, `firstname`, `surname`, `title`) VALUES
(1, 'Teter', 'Ventouris', 'Mr'),
(2, 'David ', 'Dabel', 'Mr');
|
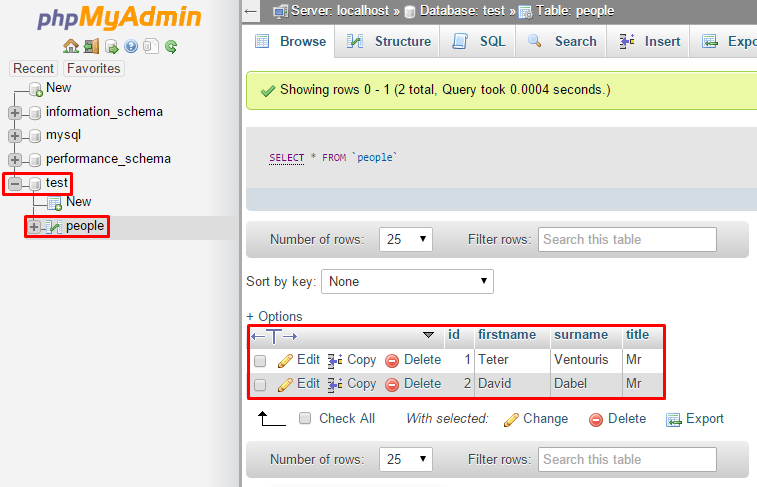
1.4) You should be getting the following output.
2) Prepare the back end code
<?php
$link = mysql_pconnect("localhost", {username},{password}) or die("Could not connect");
mysql_select_db("test") or die("Could not select database");
$arr = array();
$rs = mysql_query("SELECT * FROM people");
while($obj = mysql_fetch_object($rs)) {
$arr[] = $obj;
}
echo '{"members":'.json_encode($arr).'}';
|
3) Prepare front end code
<!DOCTYPE html>
<html>
<head>
<title>jQuery PHP Json Response</title>
<style type="text/css">
div
{
text-align:center;
padding:10px;
}
#msg {
width: 500px;
margin: 0px auto;
}
.members {
width: 500px ;
background-color: beige;
}
</style>
</head>
<body>
<div id="msg"> </div>
<script type="text/javascript" src="https://ajax.googleapis.com/ajax/libs/jquery/1/jquery.min.js">
</script>
<script type="text/javascript">
$(document).ready(function(){
var url="http://localhost/people/people.php";
$.getJSON(url,function(json){
// loop through the members here
$.each(json.members,function(i,dat){
$("#msg").append(
'<div class="members">'+
'<h1>'+dat.id+'</h1>'+
'<p>Firstname : <em>'+dat.firstname+'</em>'+
'<p>SurName : <em>'+dat.surname+'</em></p>'+
'<p>Title : <strong>'+dat.title+'</strong></p>'+
'<hr>'+
'</div>'
);
});
});
});
</script>
</body>
</html>
|
4) Run
Subscribe to:
Posts (Atom)
Labels
apt-get
(2)
bash
(4)
Chrome
(1)
CMS
(1)
code-igniter
(1)
codenvy
(1)
composer
(6)
eclipse che
(1)
error
(4)
file-permission
(1)
firebase
(2)
Free PHP Hosting
(11)
FuelPHP
(3)
git
(4)
jwt
(1)
laravel
(10)
mysql
(1)
OpenShift
(1)
php
(11)
PHP Eclipse
(9)
PHP Joomla
(2)
PHP Laravel
(4)
PHP Yii
(9)
PHP-JBOSS
(2)
php-jwt
(2)
PHP-Wordpress
(8)
plain php
(1)
Postman
(1)
REST
(2)
sqlite
(1)
sudo
(1)
visual-studio
(4)
xampp
(4)