
.
JBOSS Create PHP Project On RedHat OpenShift Server
Managing application projects on RedHat OpenShift is a lot easier through the JBOSS Developer Studio Application.
This tutorial demonstrates the steps to create a PHP Application Project using JBOSS Developer Studio.
You have to create a free account at https://www.openshift.com first before following the steps.
|
0) Pre-requisite
0.1) Create OpenShift account.
0.2) Install JDK (This tutorial uses JDK 8 32-bit jdk-8u73-windows-i586.exe for Windows installed as a portable tool) (alternative download site)
0.3) Install JBOSS Developer Studio (This tutorial uses jboss-devstudio-9.0.0.GA-installer-eap.jar package from http://tools.jboss.org/downloads/devstudio/mars/9.0.0.GA.html )
In case you get jboss rejects your Java JDK version, try installing a different version.
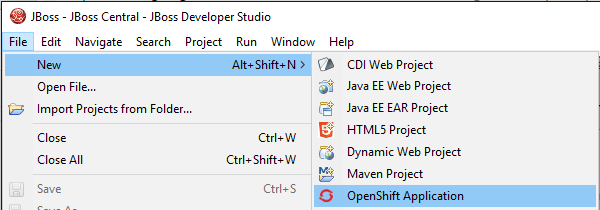
1) Create New Project
1.1) Select File/New/OpenShift Application.
1.2) Sign in to OpenShift (must have an account first)

Wait...

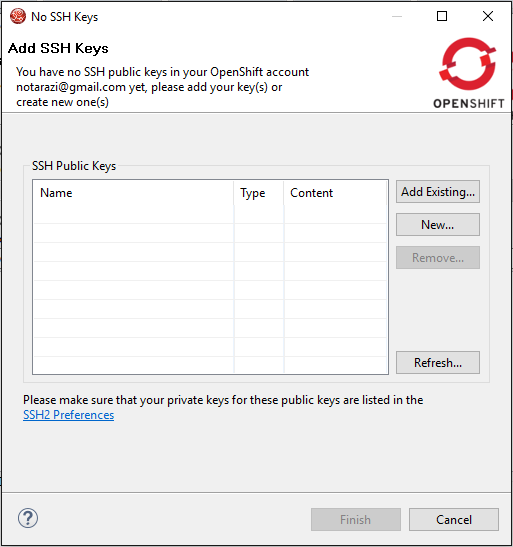
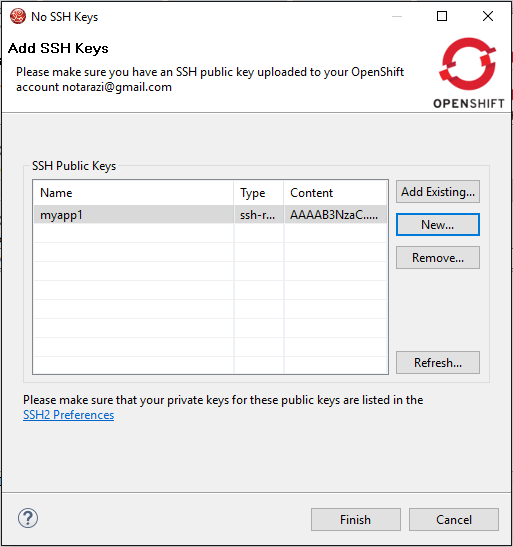
1.3) Create SSH Key (if no SSH Keys created yet)
1.3.1) Click New…
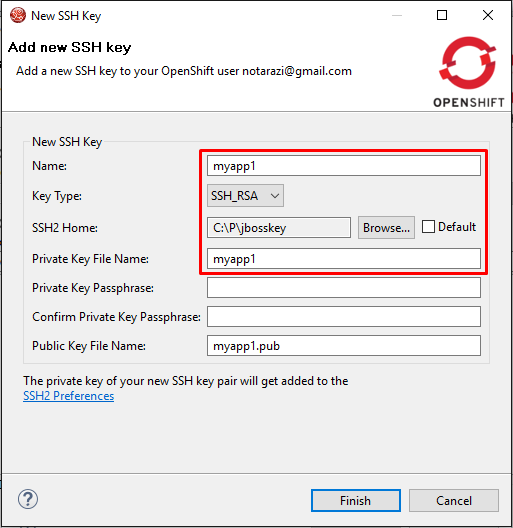
1.3.2) Enter details
Wait…

1.3.3) SSH Key created.
Wait...
1.4) Create an application.
Choose your preferred cartridges.
Find PHP.
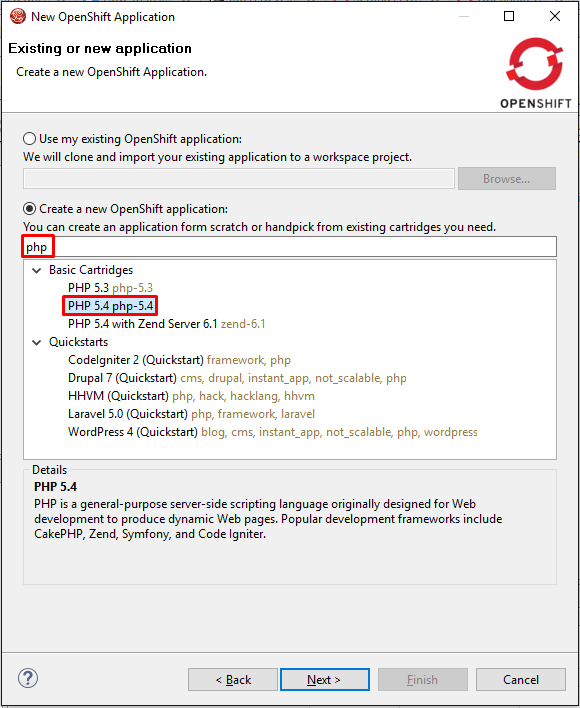
And then add MySQL with PHPMyAdmin.

Next.

Set up as a new OpenShift project.

Define your Git Clone path.
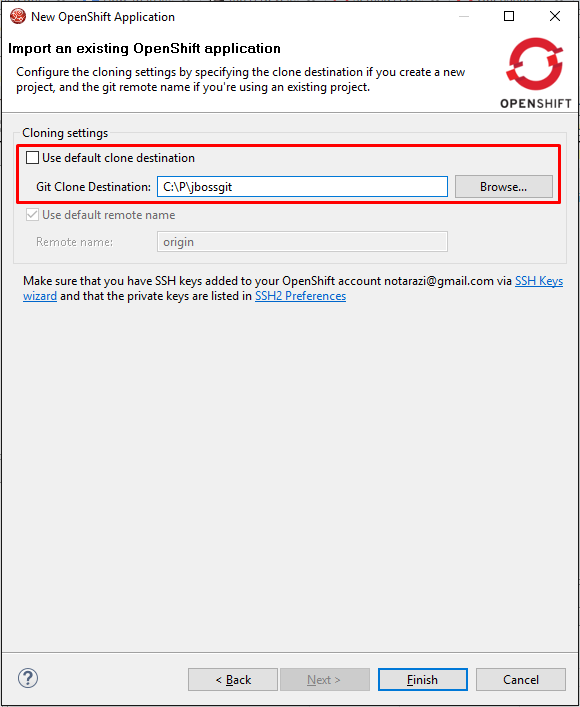
Wait...

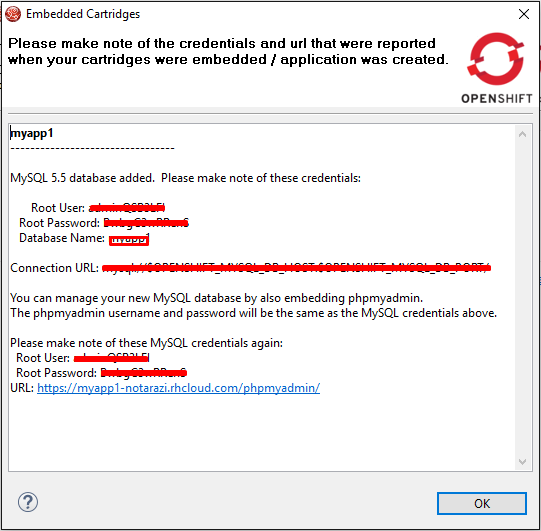
Receive the connection details.
Confirm connection to the OpenShift site.
Connection established. Project has been clone to your local machine.

2) Working with cloned project
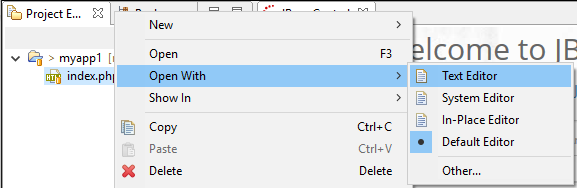
2.1) Try editing the file.
Open index.php using internal Text Editor (JBOSS Editor)
2.2) Change the content
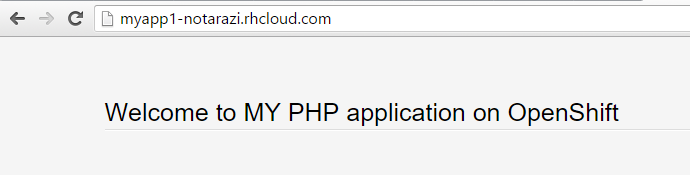
e.g. Your PHP changed to MY PHP (on line no. 211)
Initial content:

Edited content:

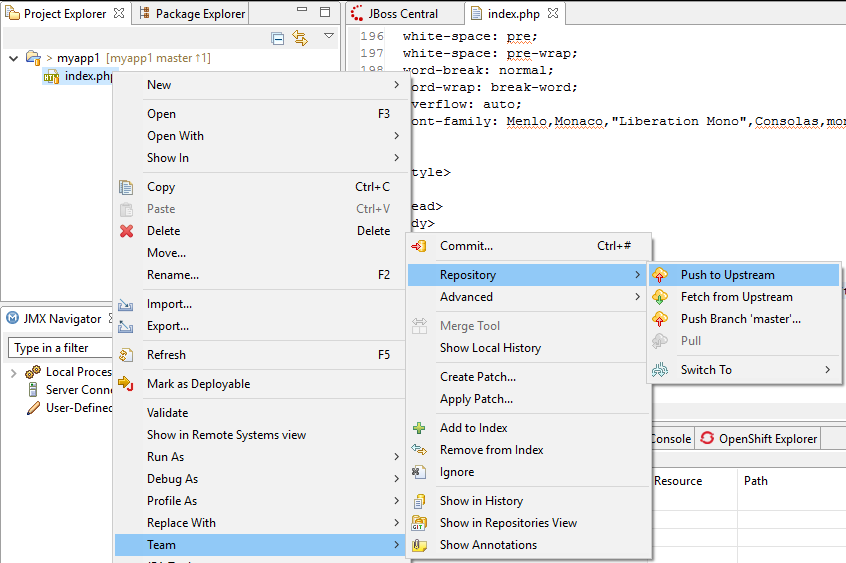
2.3) Commit


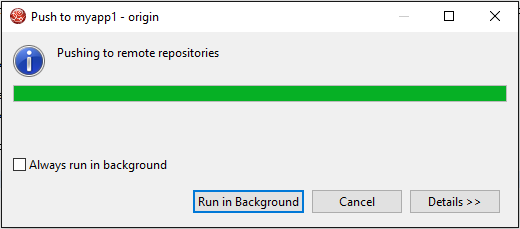
2.4) Push
Wait...
Done.

2.5) See the effects of Commit and Push in web browser
Before Push To Upstream

After Push To Upstream

This post will be very useful to us....i like your blog and helpful to me..
ReplyDeletePHP Framework Developers in India