Saturday, May 3, 2014

PHP Program Development Using Eclipse

-----
PHP Program Development Using Eclipse

STEPS

1) There are two approaches to setup PHP Development Environment in Eclipse:
1a) Using pre-package Eclipse (PDT)
1b) Download other Eclipse packages and install PDT into the package.
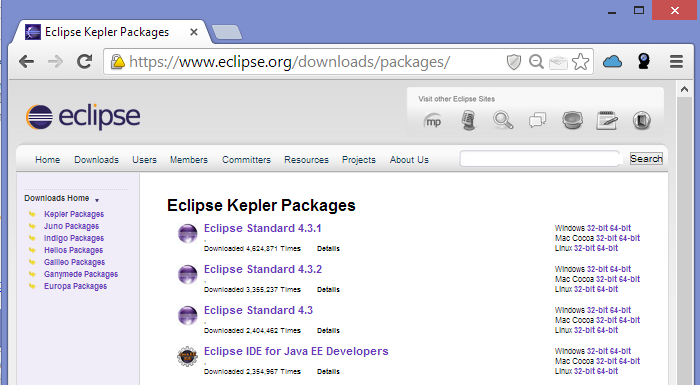
1.b.1) Browse (latest Eclipse version) at https://www.eclipse.org/downloads/packages/
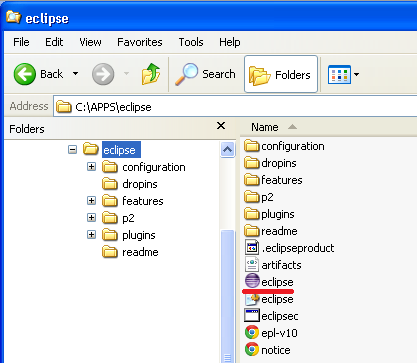
1.b.2) Unzip the eclipse package into your computer. Find the eclipse.exe program and run.
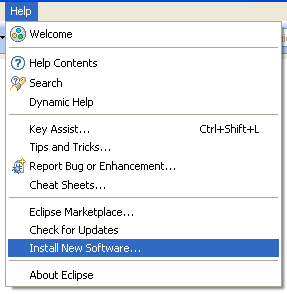
1.b.3) Go to menu Help/Install New Software…
1.b.4) In the field “Work with:” select “--All available Sites--“
The list will be populated with the available softwares.
Find the item “PHP Development Tools” and check the item.
Click Next.
You can also type “http://download.eclipse.org/tools/pdt/updates/release” in the “Work with:” field. As a result, the list shows you the item only.
2) Restart Eclipse to configure itself after the update.
3) Check that PDT is available in your eclipse.
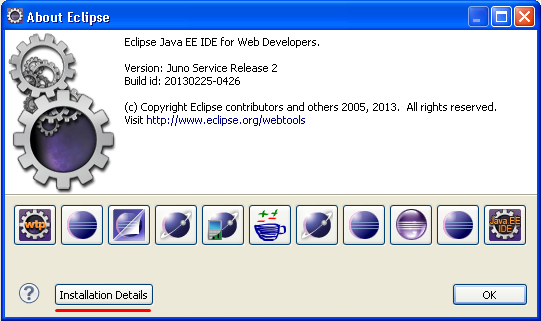
3.1) Go to menu  Help/About Eclipse.
Click Installation Details.
You should see the PDT item in the Installed Software tab list.
Click Close.
4) Set PHP Perspective layout.
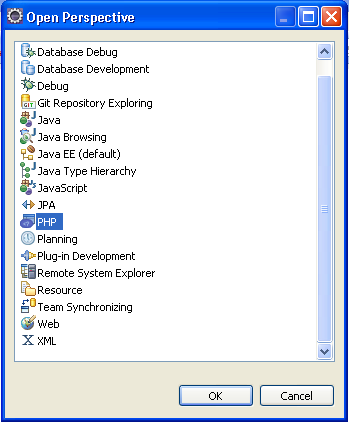
4.1) Go to menu Window/Open Perspective/Other…
4.2) Select PHP in the Open Perspective list.
Click OK.
Your Eclipse will display the PHP Development Environment Layout.
5) Test by creating a new PHP Project.
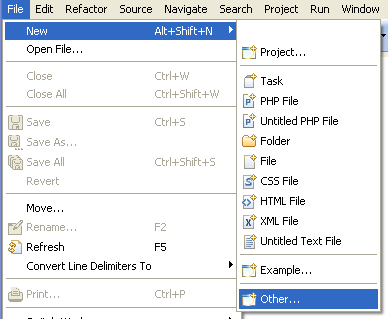
5.1) Go to menu New/Other…
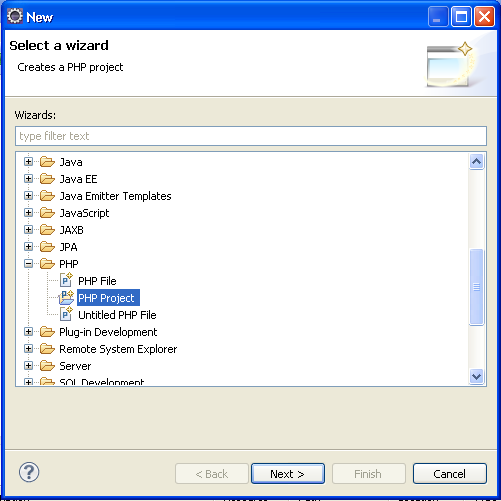
5.2) Select PHP Project.
5.3) Type the project name, “phpbasics”.
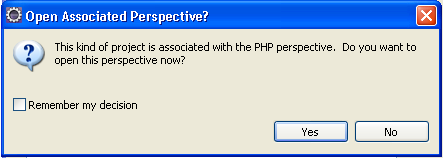
Keep clicking Next until you get the Perspective options.
5.4) You should see the project folder phpbasics in the PHP Explorer window.
5.5) Right-click the name, select New/PHP File.
5.6) Type the file name helloworld.php
Click Next.
5.7)Select PHP Template.
Select “New simple PHP file”.
Click Finish.
5.8)The PHP file helloworld.php is created in helloworld project folder and the content is displayed in the editing window.
5.9) Edit the file as follows:
<?php
echo "Hello World";
?>
5.10) View using Internal Web Browser.
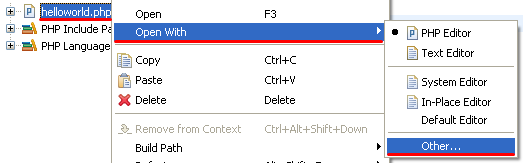
Right-click the file name, select Open With/Other…
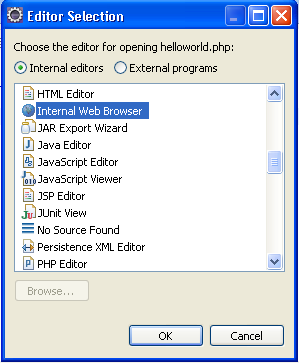
Select Internal Web Browser.
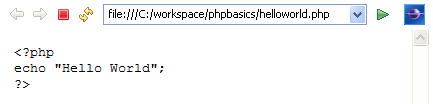
5.11) The Internal Web Browser displays the content as plain text.
To execute the text codes, we need to run a web server and view the content through the localhost URL.
6) Setting up Web Server.
6.1) The simplest web server based on Windows-Apache-MySQL-PHP (WAMP) is UwAmp. Download the package from http://www.uwamp.com/en/?page=download set the location as
C:\uwamp\…
6.2) Run uwamp.exe (that can be found at C:\uwamp\uwamp.exe.
6.3) Click Apache Config button.
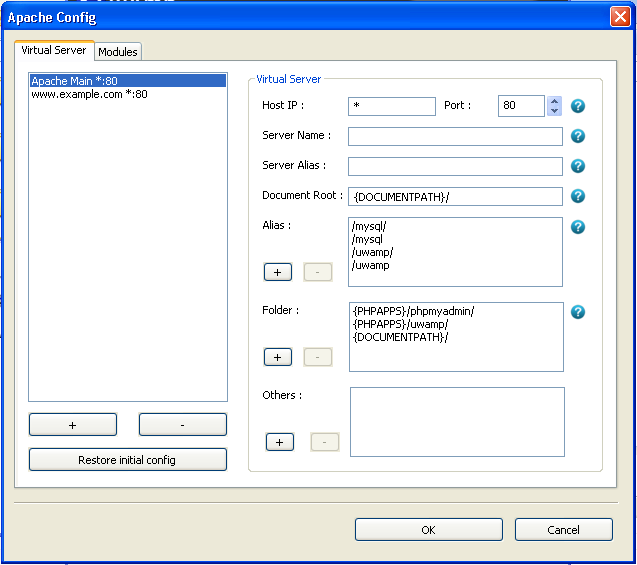
6.4) Configure Alias directory.
Under Virtual Server list, click the Apache Main item.
Look at the Alias section.
We are going to add an alias that point to our PHP project folder above.
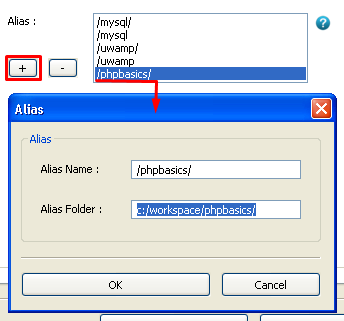
1. Click the plus button.
2. A New Alias item is added to the list.
3. Double-click the item.
4. Enter details as follows:
Alias Name: /phpbasics/
Alias Folder: c:/workspace/phpbasics
(Take note that when you type the folder path, use the separator “/”, refer the screenshot below).
Click OK.
You need to specify the Access Control Setting for the folder as well.
Click OK to return to the main Control Panel.
6.5) Browse localhost (www site)
In the Tools section, click www site.
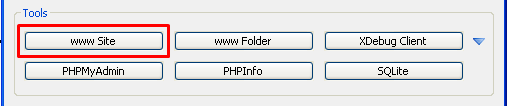
The UwAmp start page should display a link to your workspace directory under the Alias section.
If you click the link, you should see the PHP file name in the list page.
Click the helloworld.php
6.6) Switch to Eclipse and view using Internal Web Browser.
Right-click helloworld.php and select Run as/PHP Web Application.
In the Run PHP Web Application window, Click OK.
The Internal Web Browser now display the result of PHP script processing.
-----

Wednesday, April 2, 2014

HTML5 and PHPMailer 101

-----
HTML5 and PHPMailer 101

INTRODUCTION

HTML5 is the latest standard for HTML. HTML5 was designed to replace both HTML 4, XHTML, and the HTML DOM Level 2. It was specially designed to deliver rich content without the need for additional plugins. All major browsers (Chrome, Firefox, Internet Explorer, Safari, Opera) support the new HTML5 elements and APIs, and continue to add new HTML5 features to their latest versions.

STEPS

0) Pre-requisite:
1) In Notepad++ Project, create Project201.
2) Create an html5 file, contactform101.html
<!DOCTYPE html>
<html>
<head>
<meta charset="UTF-8">
<title>Contact Form</title>
<link type="text/css" rel="stylesheet" href="style.css">
</head>
<body>
    <header class="body">
        <h1>Contact Form</h1>
    </header>
    <section class="body">
    <form method="post" action="<?php echo $_SERVER['PHP_SELF'];?>">
       
    <label>Name</label>
    <input name="name" placeholder="Type Here">
           
    <label>Email</label>
    <input name="email" type="email" placeholder="Type Here">
           
    <label>Message</label>
    <textarea name="message" placeholder="Type Here"></textarea>
        
    <input id="submit" name="submit" type="submit" value="Submit">
       
</form>
    </section>
    <footer class="body">
    </footer>
</body>
</html>
3) Browse contactform101.html.
4) create css file, style.css
@charset "utf-8";
/* CSS Document */
body {
        font-size:100%;
        font-family:Georgia, "Times New Roman", Times, serif;
        color:#3a3a3a;
}
.body {
        width:576px;
        margin:0 auto;
        display:block;
}
h1 {
        width:498px;
        height:64px;
        background:url(images/h1Bg.jpg);
        color:#fff;
        font-family:bebas;
        padding:17px 0px 0px 78px;
        letter-spacing:1px;
        font-size:2.2em;
        margin:0 auto;
}
form {
        width:459px;
        margin:0 auto;
}
label {
        display:block;
        margin-top:20px;
        letter-spacing:2px;
}
input, textarea {
        width:439px;
        height:27px;
        background:#efefef;
        border-radius:5px;
        -moz-border-radius:5px;
        -webkit-border-radius:5px;
        border:1px solid #dedede;
        padding:10px;
        margin-top:3px;
        font-size:0.9em;
        color:#3a3a3a;
}
        input:focus, textarea:focus {
                border:1px solid #97d6eb;
        }
textarea {
        height:213px;
        font-family:Arial, Helvetica, sans-serif;
        background:url(images/textareaBg.jpg);
        background-repeat:no-repeat;
background-size:cover;
}
#submit {
        background:url(images/submit.jpg);
        width:127px;
        height:38px;
        text-indent:-9999px;
        border:none;
        margin-top:20px;
        cursor:pointer;
}
        #submit:hover {
                opacity:0.9;
        }
footer a img {
        border:none;
        float:right;
        margin:0px 59px 40px 0px;
}
5) save the following images to ../images/ folder.
C:\Z\TRG-PHP-ADV\h1-bg.jpg
h1Bg.jpg
C:\Z\TRG-PHP-ADV\textarea-bg.jpg
textareaBg.jpg
C:\Z\TRG-PHP-ADV\submit.jpg
submit.jpg
6) Browse
7) Append simple php scripts to send the data (without validation and protection).
<?php
if ($_POST['submit']) {
    if (mail ($to, $subject, $body, $from)) {
        echo '<p>Your message has been sent!</p>';
    } else {
        echo '<p>Something went wrong, go back and try again!</p>';
    }
}
?>
Note: mail() function requires some configuration on php.ini. You may try phpmailer instead.
8) PHPMailer.

2) unzip the folder, rename as “phpmailer”, put it under your application.

3) create the following test file, mailer.php  (change your form action target to mailer.php)

<?php
require_once('class.phpmailer.php');
//include("class.smtp.php"); // optional, gets called from within class.phpmailer.php if not already loaded

$mail             = new PHPMailer();

//$body             = file_get_contents('contents.html');
//$body             = eregi_replace("[\]",'',$body);
$body="test"; //$body=$_POST['message'];

$mail->IsSMTP(); // telling the class to use SMTP
$mail->Host       = "mail.yourdomain.com"; // SMTP server
$mail->SMTPDebug  = 2;                     // enables SMTP debug information (for testing)
                                          // 1 = errors and messages
                                          // 2 = messages only
$mail->SMTPAuth   = true;                  // enable SMTP authentication
$mail->SMTPSecure = "tls";                 // sets the prefix to the servier
$mail->Host       = "smtp.gmail.com";      // sets GMAIL as the SMTP server
$mail->Port       = 587;                   // set the SMTP port for the GMAIL server
$mail->Username   = "yourusername@gmail.com";  // GMAIL username
$mail->Password   = "yourpassword";            // GMAIL password

$mail->SetFrom('name@yourdomain.com', 'First Last');

$mail->AddReplyTo("name@yourdomain.com","First Last");

$mail->Subject    = "PHPMailer Test Subject via smtp (Gmail), basic";
//$mail->Subject    = $_POST['postTitle'];

$mail->AltBody    = "To view the message, please use an HTML compatible email viewer!"; // optional, comment out and test

$mail->MsgHTML($body);

$address = "recipient@gmail.com";
$mail->AddAddress($address, "John Doe");

//$mail->AddAttachment("images/phpmailer.gif");      // attachment
//$mail->AddAttachment("images/phpmailer_mini.gif"); // attachment

if(!$mail->Send()) {
 echo "Mailer Error: " . $mail->ErrorInfo;
} else {
 echo "Message sent!";
}
?>    


Labels