<html>
<body>
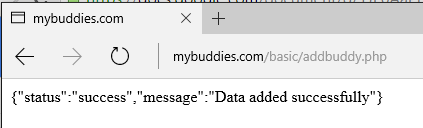
<form action="addbuddy.php" method="post">
<p>Name: <input type="text" name="name" required
onchange="setJsonData()"></p>
<p>E-mail: <input type="email" name="email"
required placeholder="Enter a valid email address"
onchange="setJsonData()"></p>
<p>Photo: <input type="text" name="photo" style="display:none;">
<input type="file" onchange="previewFile()">
<p><img src="" height="100" alt="Image preview..."></p>
<input type="hidden" name="jsondata" value="0">
<p><input type="submit" value='Submit' name="submit"></p>
</form>
<script>
//function to update the image preview
function previewFile() {
var preview = document.querySelector('img');
var file = document.querySelector('input[type=file]').files[0];
var reader = new FileReader();
reader.addEventListener("load", function () {
preview.src = reader.result;
var file = document.querySelector('input[type=file]').files[0];
document.getElementsByName("photo")[0].value = preview.src;
setJsonData();
}, false);
if (file) {
reader.readAsDataURL(file);
}
}
function setJsonData(){
var jsondata= formToJson(document.forms[0]);
document.getElementsByName("jsondata")[0].value = jsondata;
}
function formToJson(form) {
if (!form || form.nodeName !== "FORM") {
return
}
var i, j, q = [];
for (i = form.elements.length - 1; i >= 0; i = i - 1) {
if (form.elements[i].name === "") {
continue
}
switch (form.elements[i].nodeName) {
case "INPUT":
switch (form.elements[i].type) {
case "hidden": break;
case "text":
case "email":
case "password":
case "button":
case "reset":
case "submit":
q.push('"' + form.elements[i].name + '":"' + (form.elements[i].value) + '"');
break;
case "checkbox":
case "radio":
if (form.elements[i].checked) {
q.push('"' + form.elements[i].name + '":"' + (form.elements[i].value) + '"')
}
break;
case "file":
break
}
break;
case "TEXTAREA":
q.push('"' + form.elements[i].name + '":"' + (form.elements[i].value) + '"');
break;
case "SELECT":
switch (form.elements[i].type) {
case "select-one":
q.push('"' + form.elements[i].name + '":"' + (form.elements[i].value) + '"');
break;
case "select-multiple":
for (j = form.elements[i].options.length - 1; j >= 0; j = j - 1) {
if (form.elements[i].options[j].selected) {
q.push('"' + form.elements[i].name + '":"' + (form.elements[i].options[j].value) + '"')
}
}
break
}
break;
case "BUTTON":
switch (form.elements[i].type) {
case "reset":
case "submit":
case "button":
q.push('"' + form.elements[i].name + '":"' + (form.elements[i].value) + '"');
break
}
break
}
}
var jsonformat = "{" + q.toString() + "}";
return jsonformat
};
</script>
</body>
</html>
|