Tuesday, July 1, 2014

Free PHP Hosting at fortrabbit.com


---
Description:
PHP AS A SERVICE
This is hosting for developers

Core 0 €
Test drive with a full featured free environment, including Git deployment and monitoring. Freezes after some time.
MySQL 0 €
Database for development and basic usage, limited performance and storage. NOT replicated.
Total monthly 0 €

---
Link:
https://my.fortrabbit.com/register

Free PHP Hosting at freewbhostingarea.com


---
Description:
Features:
- long time running company - we offer free hosting from 2005 without interruption (orgfree.com, 6te.net, ueuo.com).
- your account will never expire; you can host your site for free as long as you wish (minimum 1 hit/month required);
- fast hosting on 8-Core CPU servers with 32 GB of RAM per server;
- free web space - up to 1500MB with 12 MB file size limit; ALL files allowed for upload; no limit for number of files/inodes;
- unmetered traffic;
- daily/weekly backups on external source - peace in mind as your files will never be lost;
- absolutely no ads for low traffic sites;
- all countries/languages allowed;


- free php5 hosting - (latest stable 5.4) with mail() active, GD2 library, php curl, php magickwand/imagick
(support for ImageMagick), php sockets, php xml, xsl, php soap, php pdo -- see default php variables;
- possibility to turn on/off php variables;
- Ioncube loader for php 5.4; memcache and memcached with igbinary support;
 - free MySQL 5 database (latest stable 5.5);
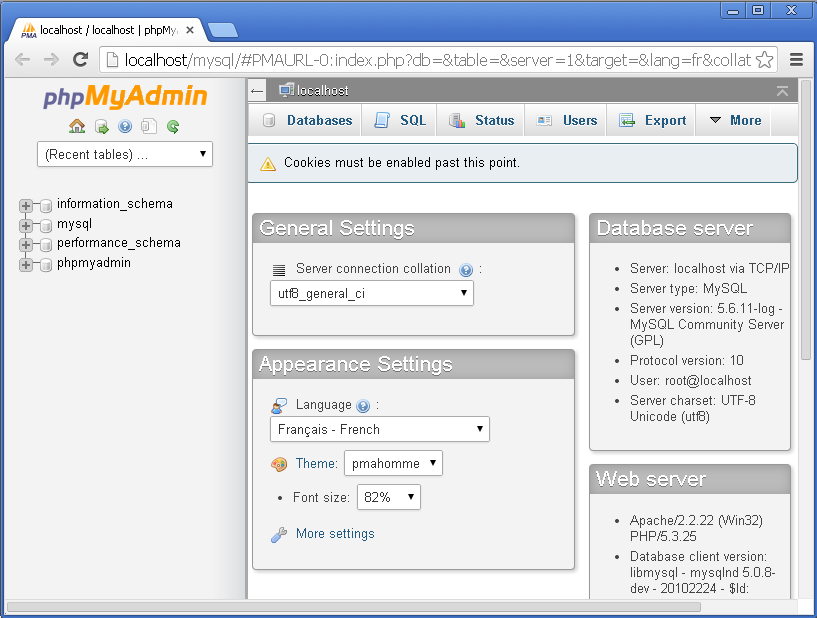
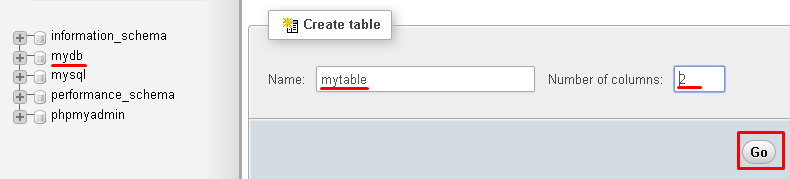
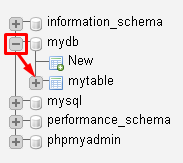
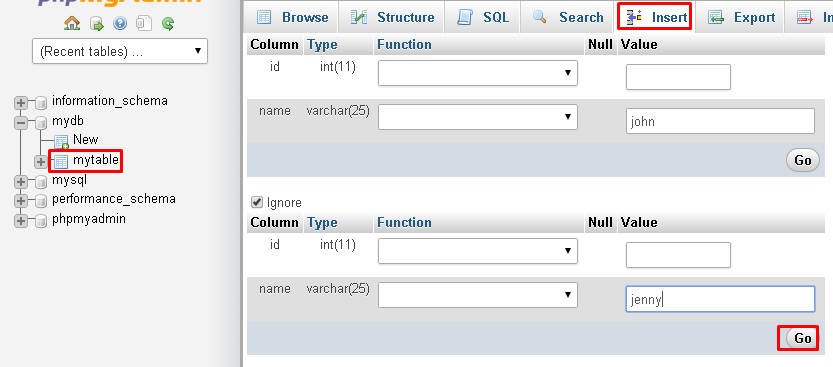
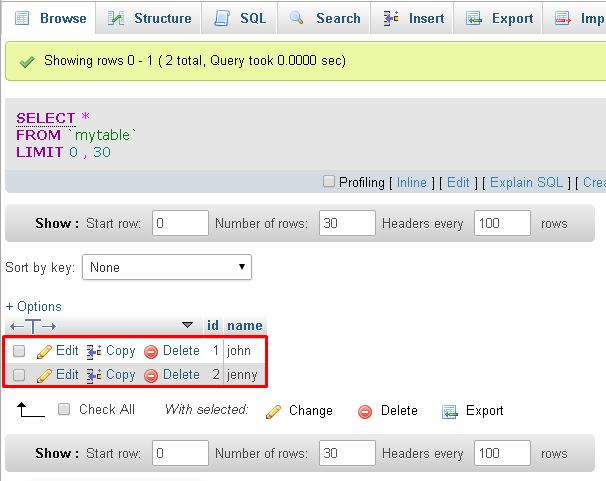
- phpMyAdmin preinstalled; one click database backup;  one click database import;
- unlimited accounts/databases allowed (database number per account is limited, but you can create more accounts);

 - account manager - tool to change account details, File Manager (WYSIWYG File Editor, FTP client - browser based, tool to set file permissions, to create directories, to create files, tool for renaming, zip/unzip utility and more).
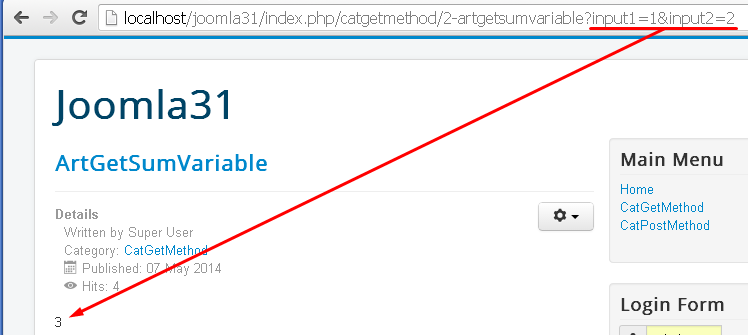
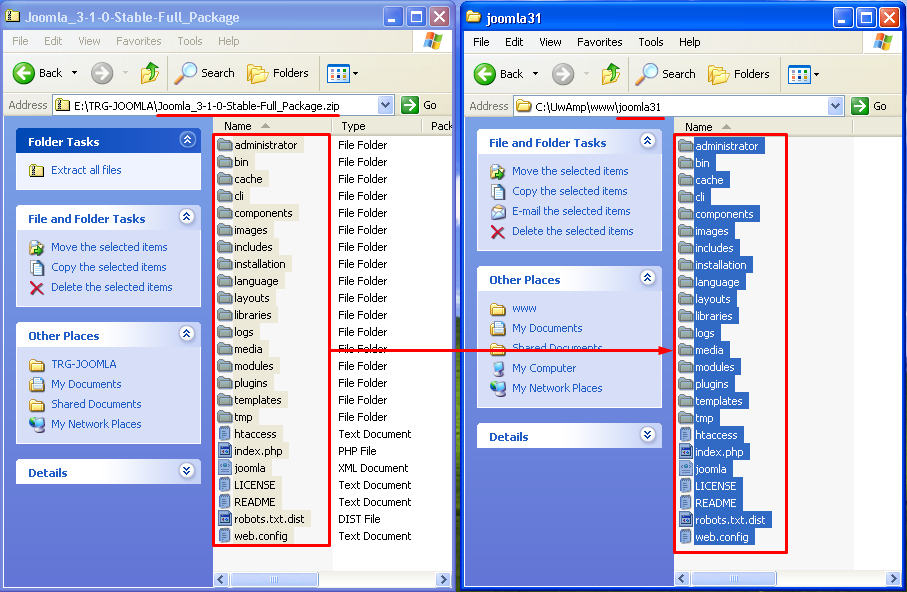
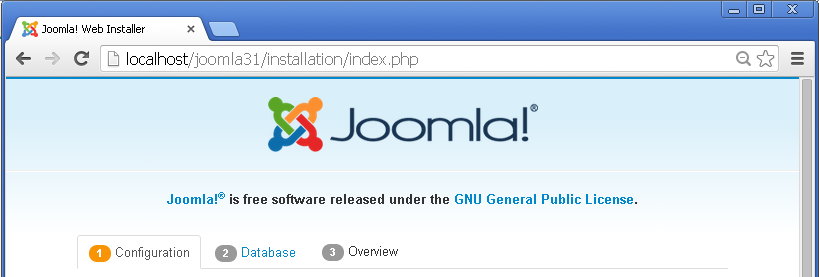
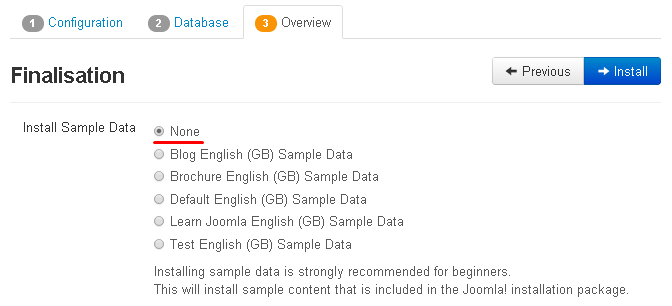
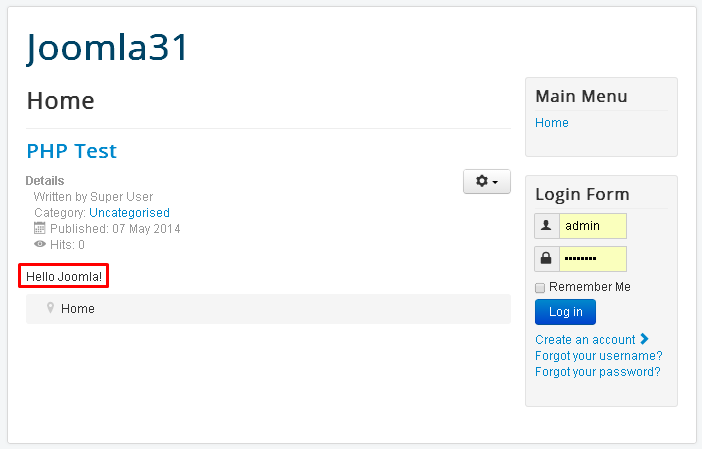
- one click autoinstaller (free forum, blog): Joomla, phpBB3, SMF, WordPress, Drupal, Mambo;
- mod_rewrite enabled (apache 2.2); full dot files support (.htpasswd, .htaccess - posibility to set custom error pages, to block unwanted ips/sites, to turn on/off indexes etc. etc.);
- possibility to reset account, to fix ownership;
- predefined customizable error pages 403.html, 404.html;
- full FTP support, web-ftp application available;
- SSI support (Server Side Includes - .shtml);
- instant activation - registration process is automatic - you will be able to access your new account in minutes (or seconds, depening on how fast you are);
- FREE 24/7 Technical Support;
- full email support (pop/imap) and unlimited subdomains subdomain.yourdomain.com for domain owners. Check email tutorial.
---
Link:
http://www.freewebhostingarea.com/

Free PHP Hosting at 0fees.net


---
Description:

Welcome to our free hosting service. We are providing professional, fast PHP & MySQL hosting, powered by world-famous clustered hosting technology. We invite you to sign up for a free hosting account and get your own website on the internet in seconds! Accounts are activated instantly so you don't need to wait around for an account.

Free Web Hosting Features
We offer you the most advanced free web hosting (no ads) with PHP and MySQL database support. We have just opened in March 2008, and now we have over 7000 registrations!

---
Link:
http://0fees.net/

Free PHP Hosting at freehostia.com


---
Description:

With the Chocolate free web hosting plan you get a fully featured free PHP hosting with MySQL support. You can host your PHP-driven website and you get excellent performance, load speed and uptime. You can switch between PHP4 and PHP5 and you get control over the PHP settings both through a user-friendly web interface and with direct access to your free web hosting account’s php.ini file.

Excellent speed and productivity

Thanks to FreeHostia’s innovative cluster-based web hosting platform you get excellent performance and uptime even with the free PHP web hosting plan. Load is distributed between servers and there are separate servers performing specific tasks, such as MySQL, e-mail etc., which guarantes optimal performance and guarantees fast loading speeds.

Free PHP web applications

With the 1-click installer integrated within the web hosting control panel and included in the free web hosting plan you can install over 40 popular PHP web applications with just a few clicks – no need to upload files or perform complicated installation procedures. You simply select the script, which you want to install, point to where you want it installed and enter your admin details. It really takes less than 5 minutes and saves you both work and time.
---
Link:
http://www.freehostia.com/free-php-hosting.html

Free PHP Hosting at awardspace.com


---
Description: Flexible Tools & Pricing from beginner-friendly to high-end company solution
---
Link: https://www.awardspace.net/signup.html?gid=1111&

Free PHP hosting at x10Hosting.com


---
Description: With our free PHP hosting you're able to run the applications you want. We support almost all functionality of PHP and do not limit you with hundreds of disabled functions or safe mode. Want to run a blog? You can do that. Want to host forums? Yep, you can do that, too. Simply put, you just can't run a website these days without PHP functionality, and we give that to you free of charge!

If you have a free account, you can use sendmail and fsockopen, both vital functions for a website. If you subscribe to our x10Premium hosting plan, you get even more functionality including the ability to accept large uploads. This is perfect for accepting attachments or other files from your community members. Free hosting does have some restrictions for security reasons, we have listed them below. You can also see some more details of how our free hosting package compares to the premium one on our comparison page.
---
Link: https://www.x10hosting.com/free-php-hosting

Free PHP Hosting at ByteHost.com


---
Description: For any web site from a small business brochure, pictures of a tropical holiday, to powerful dynamic websites for a gaming clan etc, Byet Internet has the right services for you and at the right price... $0.00!

Byet gives you the choice of your sub domain. You can stick with yoursite.byethost.com, or you can pick from another 7 great names we have available. With MySQL, PHP, FTP, VistaPanel (our specially designed control panel) and other features, you can host heaps of scripts with no worries. Adding your own domain registered at any domain registrar is just a few clicks and is hosted on your free Byet account!
---
Link: http://byethost.com/index.php/free-hosting

Free PHP Hosting at Zymic.com


---
Description: At Zymic we offer free web hosting, with a level of professionalism any paid web hosting company offers, along with a full range of free hosting features.
We pride ourselves in being one of the most reliable and feature packed free web hosting services on the net. Our free hosting features include PHP/MySQL, free sub-domain names, Ad-free hosting and an overly generous disk and transfer allowance. Zymic.com's free web hosting is ideal for personal and business websites.
---
Link: http://www.zymic.com/free-web-hosting/

Free PHP Hosting at 000webhost.com


---
Description: We offer free web hosting with unrestricted PHP support, enjoy benefits of PHP 5 absolutely free. Unlike other free webhosts, we have PHP and MySQL enabled with no limits!
---
Link: http://www.000webhost.com/free-php-hosting

Wednesday, May 7, 2014

Organizing Joomla Articles and Main Menu (For PHP developer)

-----
Organizing Joomla Articles and Main Menu (For PHP developer)

STEPS

1) Create Article Category.

1.1) In Admin Page, go to menu Content/Category Manager/Add New Category.
1.2) Create “CatGetMethod” category.
1.3) Repeat Step 1.1 and 1.2 to create “CatPostMethod” category.

2) Create Article.

2.1) Go to menu Content/Article Manager/Add New Article.
2.2) Type PHP codes…
ArtGetSumVariables
<?php
//assume user input 1,2
$var1=$_GET["input1"];
$var2=$_GET["input2"];
echo $var1+$var2;
?>
2.3) Repeat for ArtPostSumVariables
ArtPostSumVariables
<form method="POST" action="" >
        input1: <input type="text" name="input1"><br/>
        input2: <input type="text" name="input2"><br/>
        <input type="submit" name="submit">
</form>
<?php
//get value from POST input
$var1=$_POST["input1"];
$var2=$_POST["input2"];
echo $var1+$var2;
?>

3) Create Menu Item.

3.1) Go to menu Menus/Main Menu/Add New Menu Item.
3.2) Add Menu Item Type as “Category List”.
Choose “CatGetMethod”.
3.3) Repeat Step 3.2 to create “CatPostMethod”.

4) Browse http://localhost/joomla31

4.1) Click the CatGetMethod menu link.
4.2) Click the Article “ArtGetSumVariable”.
You may get notice message.
Append “?input1=1&input2=2” to the URL texts.
4.3) Try open the ArtPostMethod.
You may get Notice message.
4.4) Type the values 1 and 2 and click Submit.
-----

How To Write PHP Code In Joomla Article

-----
How To Write PHP Code In Joomla Article

INTRODUCTION

This tutorial uses the following packages:
1) uWamp as the Window-Apache-MySQL-PHP package. (For further info, follow this link, http://setup-steps.blogspot.com/2014/03/uwamp-221.html)
3) Joomla DirectPHP Plug-in (Download from here, https://drive.google.com/file/d/0B86b-ALn-1MGZXpzZXpGSlY3UWs/edit?usp=sharing )

STEPS

0) Setup the uWamp.

1) Extract the Joomla Package content.

Extract to ..\uwamp\www\joomla31\...

2) Create database “joomla31”.

Run phpmyadmin.
Create a database “joomla31”.

3) Browse http://localhost/joomla31 

3.1) You will be redirected to http://localhost/joomla31/
There are 3 steps that you need to follow to setup Joomla 31 successfully.
Step1: Configuration
Enter details and click Next.
Step 2: Database.
Enter the database configuration details and click Next.
Step 3: Finalisation
Click Install.
Installation Done.
Click “Remove installation folder” button.

4) Browse http://localhost/joomla31 again.

You should get Joomla Front Page.

5) Browse http://localhost/joomla31/administrator.

You should get Joomla Back-end Login page.
Enter your admin login credential (refer step 3.1).
You should see Joomla Control Panel page.

6) Install DirectPHP Plug-in

6.1) You need DirectPHP plug-in (download from here, https://drive.google.com/file/d/0B86b-ALn-1MGZXpzZXpGSlY3UWs/edit?usp=sharing )
6.2) Go to menu Extensions/Extension Manager.
6.3) Choose the DirectPHP plug-in and click Upload & Install.
6.4) You should get a success message.
6.5) Go to menu Extensions/Plug-in Manager.
6.6)  Type “DirectPHP” in the search box. Click the button in the Status column to enable it.
6.7) You should get a success message.
6.8) Next, disable Tiny MCE Editor plug-in.
7) Create PHP Content.
7.1) Go to menu Content/Article Manager/Add New Article.
7.2) Create a new article.
Title= PHP Test
Content=
<?php
echo “Hello Joomla!”;
?>
Click Save & Close button.
7.3) When Joomla shows you the article lists, click the star button for the above article.
It should be like this now:
The article that you have just created should appear on the Front Page and it displays “Hello Joomla!”
-----

PHP Eclipse 108: Working with MySQL Database

-----
PHP Eclipse 108: Working with MySQL Database
Contents

INTRODUCTION

This tutorial is adapted from: http://www.w3schools.com/php/php_mysql_intro.asp

STEPS

0) Create subfolder 108.

1) Prepare Database

1.1) Run phpmyadmin
1.2) Take note that by default superuser name is “root” and the password is “root”.
1.3) phpmyadmin page appears in your web browser.

2) Create database.

2.1. Click Database tab.
2.2. Type “mydb”.
2.3. Click Create.
2.4. mydb created. you can see the database name in the database side panel.
2.5. Click mydb, type “mytable”, type “2”, click Go.
2.6. mytable name will appear under mydb in the side pane;.
2.7. click mytable name, click Insert tab. Type the name john and jenny and clik Go.
2.8) Click Browse tab. Check that the new records are shown.

3) Connecting To MySQL Database.

testconnection.php
<?php
// Create connection
$con=mysqli_connect("localhost","root","root","my_db");
// Check connection
if (mysqli_connect_errno()) {
  echo "Failed to connect to MySQL: " . mysqli_connect_error();
}
?>
3.1) testing with wrong database name.
3.2) you will get a warning message “unknown database”.

4) Create Database using PHP Script.

createdatabase.php
<?php
$con=mysqli_connect("localhost","root","root");
// Check connection
if (mysqli_connect_errno()) {
  echo "Failed to connect to MySQL: " . mysqli_connect_error();
}
// Create database
$sql="CREATE DATABASE my_db";
if (mysqli_query($con,$sql)) {
  echo "Database my_db created successfully";
} else {
  echo "Error creating database: " . mysqli_error($con);
}
?>

5) Create Table using PHP Script.

createtable.php
<?php
$con=mysqli_connect("localhost","root","root","my_db");
// Check connection
if (mysqli_connect_errno()) {
  echo "Failed to connect to MySQL: " . mysqli_connect_error();
}
// Create table
$sql="CREATE TABLE Persons(FirstName CHAR(30),LastName CHAR(30),Age INT)";
// Execute query
if (mysqli_query($con,$sql)) {
  echo "Table persons created successfully";
} else {
  echo "Error creating table: " . mysqli_error($con);
}
?>
5.1) Check in phpmyadmin that your operations above have really taken effect.
5.2) You can drop the table and recreate the table using SQL commands via phpmyadmin as well.
CREATE TABLE Persons
(
PID INT NOT NULL AUTO_INCREMENT,
PRIMARY KEY(PID),
FirstName CHAR(15),
LastName CHAR(15),
Age INT
);
5.2) Click my_db path, click SQL tab, type the following SQL commands and click Go.

6) Insert Records using PHP Script.

insertrecords.php
<?php
$con=mysqli_connect("localhost","root","root","my_db");
// Check connection
if (mysqli_connect_errno()) {
  echo "Failed to connect to MySQL: " . mysqli_connect_error();
}
mysqli_query($con,"INSERT INTO Persons (FirstName, LastName, Age)
VALUES ('Peter', 'Griffin',35)");
mysqli_query($con,"INSERT INTO Persons (FirstName, LastName, Age)
VALUES ('Glenn', 'Quagmire',33)");
mysqli_close($con);
?>

7) Create HTML Form and PHP Script to insert date into the database.

7.1) Entry form.
insert.html
<html>
<body>
<form action="insert.php" method="post">
Firstname: <input type="text" name="firstname">
Lastname: <input type="text" name="lastname">
Age: <input type="text" name="age">
<input type="submit">
</form>
</body>
</html>
7.2) Entry processing.
insert.php
<?php
$con=mysqli_connect("localhost","root","root","my_db");
// Check connection
if (mysqli_connect_errno()) {
  echo "Failed to connect to MySQL: " . mysqli_connect_error();
}
// escape variables for security
$firstname = mysqli_real_escape_string($con, $_POST['firstname']);
$lastname = mysqli_real_escape_string($con, $_POST['lastname']);
$age = mysqli_real_escape_string($con, $_POST['age']);
$sql="INSERT INTO Persons (FirstName, LastName, Age)
VALUES ('$firstname', '$lastname', '$age')";
if (!mysqli_query($con,$sql)) {
  die('Error: ' . mysqli_error($con));
}
echo "1 record added";
mysqli_close($con);
?>
7.3. Browse insert.html.
7.4) Enter data. Click Submit Query.
7.5) You should get success message.

8) Extract records from database using PHP Script.

8a) Basic display

displayrecords.php
<?php
$con=mysqli_connect("localhost","root","root","my_db");
// Check connection
if (mysqli_connect_errno()) {
  echo "Failed to connect to MySQL: " . mysqli_connect_error();
}
$result = mysqli_query($con,"SELECT * FROM Persons");
while($row = mysqli_fetch_array($result)) {
  echo $row['FirstName'] . " " . $row['LastName'];
  echo "<br>";
}
mysqli_close($con);
?>

8b) Tabular Format Display.

displaytabulardata.php
<?php
$con=mysqli_connect("localhost","root","root","my_db");
// Check connection
if (mysqli_connect_errno()) {
  echo "Failed to connect to MySQL: " . mysqli_connect_error();
}
$result = mysqli_query($con,"SELECT * FROM Persons");
echo "<table border='1'>
<tr>
<th>Firstname</th>
<th>Lastname</th>
</tr>";
while($row = mysqli_fetch_array($result)) {
  echo "<tr>";
  echo "<td>" . $row['FirstName'] . "</td>";
  echo "<td>" . $row['LastName'] . "</td>";
  echo "</tr>";
}
echo "</table>";
mysqli_close($con);
?>

9) Extract selected record from table.

selectrecord.php
<?php
$con=mysqli_connect("localhost","root","root","my_db");
// Check connection
if (mysqli_connect_errno()) {
  echo "Failed to connect to MySQL: " . mysqli_connect_error();
}
$result = mysqli_query($con,"SELECT * FROM Persons
WHERE FirstName='Peter'");
while($row = mysqli_fetch_array($result)) {
  echo $row['FirstName'] . " " . $row['LastName'];
  echo "<br>";
}
?>

10) Sort record in display.

sortrecords.php
<?php
$con=mysqli_connect("localhost","root","root","my_db");
// Check connection
if (mysqli_connect_errno()) {
  echo "Failed to connect to MySQL: " . mysqli_connect_error();
}
$result = mysqli_query($con,"SELECT * FROM Persons ORDER BY age");
while($row = mysqli_fetch_array($result)) {
  echo $row['FirstName'];
  echo " " . $row['LastName'];
  echo " " . $row['Age'];
  echo "<br>";
}
mysqli_close($con);
?>

11) Update Records in table.

updaterecords.php
<?php
$con=mysqli_connect("localhost","root","root","my_db");
// Check connection
if (mysqli_connect_errno()) {
  echo "Failed to connect to MySQL: " . mysqli_connect_error();
}
mysqli_query($con,"UPDATE Persons SET Age=36
WHERE FirstName='Peter' AND LastName='Griffin'");
mysqli_close($con);
?>

12) Delete Record in table.

deleterecord.php
<?php
$con=mysqli_connect("localhost","root","root","my_db");
// Check connection
if (mysqli_connect_errno()) {
  echo "Failed to connect to MySQL: " . mysqli_connect_error();
}
mysqli_query($con,"DELETE FROM Persons WHERE LastName='Griffin'");
mysqli_close($con);
?>
-----

Labels